Installing a waterproof backer board on a floor is a crucial step in various construction and renovation projects, especially in areas prone to moisture, such as bathrooms, kitchens, and laundry rooms. As a supplier of high – quality waterproof backer boards, I’ve seen firsthand how the right installation process can make a significant difference in the longevity and performance of the final project. In this blog, I’ll walk you through the detailed installation process of a waterproof backer board on a floor. Waterproof Backer Board

Pre – installation Preparations
Before you start the actual installation, there are several important preparatory steps to take. First and foremost, assess the floor surface. The existing floor should be clean, level, and free of any debris, grease, or loose materials. Use a scraper or a floor grinder to remove any bumps, adhesives, or old flooring remnants. A level surface is essential because an uneven floor can cause the backer board to crack or warp over time, compromising its waterproofing capabilities.
You’ll also need to measure the area accurately. Measure the length and width of the floor space where you’ll be installing the backer board. This measurement will help you determine how many boards you need to purchase. It’s always a good idea to buy a few extra boards to account for any cutting mistakes or future repairs.
Gather all the necessary tools and materials. You’ll need a utility knife, a circular saw with a carbide – tipped blade, a drill, screws, a trowel, a level, a measuring tape, and a waterproofing membrane. The type of screws you use is crucial; they should be corrosion – resistant to prevent rusting in a moist environment.
Floor Preparation
Once the floor is clean and measured, it’s time for further preparation. If the existing floor is made of wood, check for any loose or squeaky boards. Secure them by driving in new nails or screws. If there are any gaps between the floorboards, fill them with a wood filler and sand the area smooth once it’s dry.
For concrete floors, you may need to etch the surface to improve the adhesion of the backer board. Use a concrete etching solution according to the manufacturer’s instructions. Rinse the floor thoroughly after etching and let it dry completely.
Next, apply a waterproofing membrane to the floor. Roll the membrane out over the prepared floor surface, starting from one corner. Use a trowel to smooth out any wrinkles or bubbles. Make sure the membrane overlaps at the seams by at least 2 inches. The waterproofing membrane acts as an additional layer of protection against moisture seeping through the floor and into the subfloor.
Cutting the Backer Boards
Carefully measure and mark the backer boards according to the dimensions of the floor area. When using a circular saw, wear safety goggles and a dust mask to protect yourself from the dust generated during the cutting process. Cut the boards along the marked lines. Make sure the cuts are straight and precise.
For areas with irregular shapes or cutouts, such as around pipes or drains, use a utility knife to score the board and then snap it along the scored line. You can also use a jigsaw for more complex cuts.
Installing the Backer Boards
Start installing the backer boards from one corner of the room. Position the first board so that it covers the waterproofing membrane. Leave a 1/8 – inch gap between the board and the wall to allow for expansion.
Use a drill to make pilot holes in the backer board. The pilot holes should be slightly smaller in diameter than the screws you’re using to prevent the board from cracking. Drive the screws into the pilot holes at intervals of about 6 – 8 inches around the perimeter of the board and 8 – 10 inches in the field of the board. Make sure the screws are flush with the surface of the backer board.
As you install each subsequent board, place it adjacent to the previous one, leaving a 1/8 – inch gap between the boards. This gap is important to allow for natural expansion and contraction of the boards due to changes in temperature and humidity.
Seaming and Finishing
After all the boards are installed, it’s time to address the seams. Apply a waterproof seam tape over the gaps between the boards. Press the tape firmly into place to ensure good adhesion.
Then, use a trowel to apply a thin layer of thinset mortar over the seam tape. Smooth out the mortar so that it is level with the surface of the backer boards. This step not only seals the seams but also provides additional strength to the overall installation.
Once the thinset mortar has dried, you can proceed with the final finishing touches. You can install your chosen flooring material, such as tiles, directly on top of the waterproof backer board. The backer board provides a stable and waterproof base for the flooring, ensuring a long – lasting and beautiful finish.
Quality Checks
Before moving on to the next phase of your project, it’s essential to conduct a quality check. Inspect the installed backer boards for any signs of unevenness, loose screws, or gaps that were not properly sealed. Check the level of the floor using a long – level. If you find any issues, address them immediately.
Also, make sure the waterproofing membrane and the seam tape are intact and properly adhered. Any compromise in the waterproofing can lead to water damage in the future.
Why Choose Our Waterproof Backer Boards
At our company, we take pride in providing top – notch waterproof backer boards. Our boards are made from high – quality materials that are specifically designed to withstand moisture and humidity. They are lightweight yet strong, making them easy to handle during installation.
Our boards also have excellent dimensional stability, which means they are less likely to warp or crack over time. This ensures a long – lasting and reliable installation. Additionally, our products are tested to meet or exceed industry standards, giving you peace of mind that you’re getting a quality product.
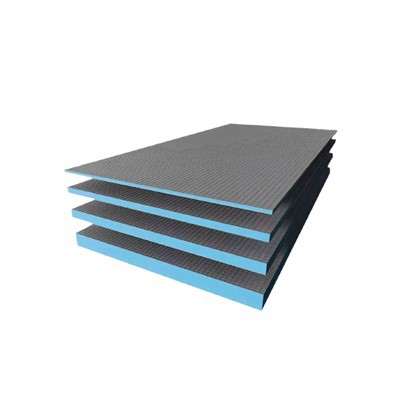
If you’re planning a project that requires a waterproof backer board for your floor, I encourage you to consider our products. Our team of experts is always ready to provide you with technical support and advice on the best installation practices.
Waterproof Backer Board Contact us today to discuss your project requirements and to get a quote. Our sales representatives will be happy to answer all your questions and guide you through the purchasing process. Whether you’re a professional contractor or a DIY enthusiast, we have the right solution for your waterproofing needs.
References
- "Building Construction Handbook" by Arthur Goldman
- "Complete Guide to Tile Installation" by John Bridge
- Manufacturer’s Installation Guides for Waterproof Backer Boards
Yiheng Holdings Co., Ltd.
As one of the leading waterproof backer board manufacturers and suppliers in China, we warmly welcome you to buy advanced waterproof backer board made in China here from our factory. All customized products are with high quality and competitive price. Also, pricelist is available.
Address: Zhongze Village, Baohai Town, Tiantai County, Taizhou City, Zhejiang Province
E-mail: 906915688@qq.com
WebSite: https://www.yhhold.com/
